

Hey, it's Laura. I have really been stretched by this month's Designer Challenge for Globecraft and Piccolo: background papers. In fact, I have sort of stretched my definition of background papers. Let me show you.
It is actually part of a two page spread, but I will show you the other side at the end of the post. It is created with the same techniques, which I will outline: stenciling, stamping, and direct application.
 |
| Laura Drahozal Remembering Life's Moments |
Piccolo Embossing Powder Adhesive
Piccolo Powders in your desired color; I used 24K Gold
Stencil; I chose Dreamweaver Fleur De Lis LJ 841
Stencil Brush
Paper Towel
Paper; I used DCWV Timeless Texture Pac
Scrap Card Stock
Repositionable Adhesive
Removable Tape
Heat Gun
Directions:
1) If you would like to mask out the background, and not stencil the whole thing, cut the scrap card stock to fit your picture.

2) Use repositionable adhesive to adhere the card stock in the position that you would like place your picture.
3) Place the stencil where you like it. Adhere with removable tape.

4) Remove the lid from the Embossing Powder Adhesive container and dip the stencil brush into the liquid.

5) Tap off the excess liquid on paper towel.
6) Tap the stencil brush straight up and down over the stencil.

7) Remove the stencil.
8) Pour embossing powder on image and gently tap off the excess.

9) Heat emboss.

10) When you remove the card stock, you will have a blank area on the inside to adhere the photograph.
Stamping & Materials:
Piccolo Embossing Powder Adhesive
Piccolo Embossing Powder of your choice; I used 24 K Gold.
Stamp; I used a Stampabilities stamp and a Hero Arts Stamp.
Paper
Heat Gun
Paper Towel
Directions:
1) Use the Globecraft and Piccolo Embossing Powder Adhesive's unique applicator bottle to cover the stamp.
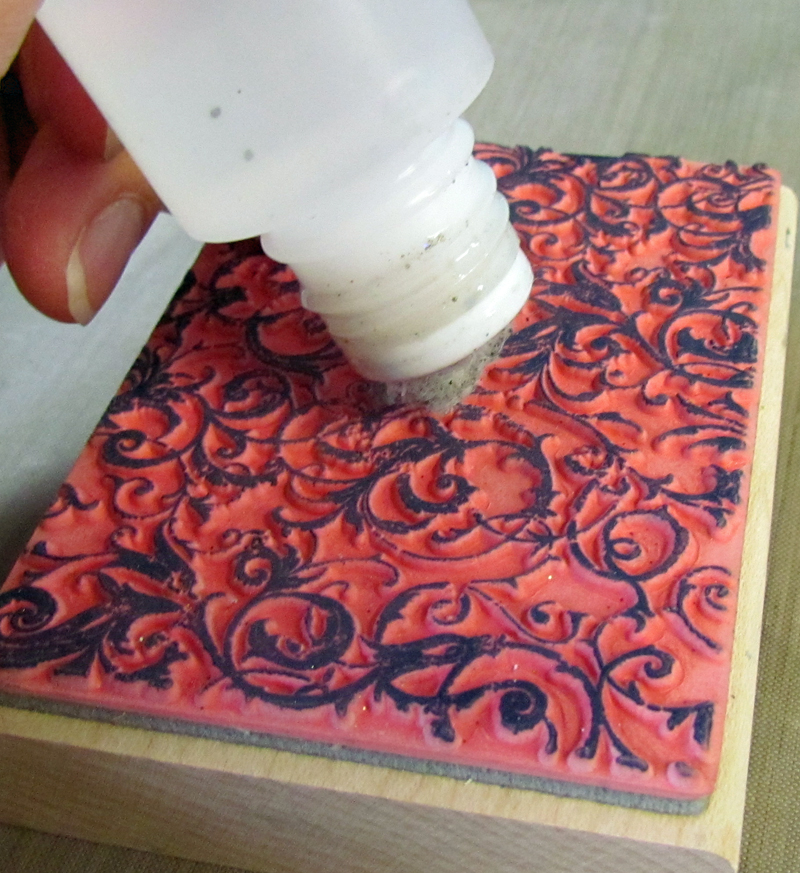
2) Stamp on the paper.
3) Pour Piccolo Embossing Powder onto image and gently tap to remove excess.
4) Heat set with heat tool.
5) When cool, gently buff with the paper towel to remove any additional powder.
Direct Application & Materials:
Piccolo Embossing Powder Adhesive
Piccolo Embossing Powder of your choice; I used Vintage Gold
Object you would like to emboss; I used the papers that I previously embossed, a title cut from card stock with my Silhouette Machine, and Piccolo Fluer De Lis.
Piccolo Easy Grip Tweezers
Heat Gun
Directions:
1) Use the applicator in the Embossing Powder Adhesive to directly apply the liquid to the object.
 |
Just around the edges on the papers! |
 |
All over the other objects! |
2) Pour the powder over the object.

3) VERY carefully tap off any excess from the papers OR move the object out of the pile of powder using the tweezers.
4) Heat emboss.
 |
| Be sure to use the tweezers to hold the small objects when you emboss! |

5) Repeat the above steps for the book board objects.
You may be wondering how I stretched the theme this month. After all, I am showing you three different ways to use the powders on backgrounds. But, there is the stretch! Look carefully, and you will see that I have not used these powders for the background papers at all, but instead for the mats! Here is the other side of the two page spread:

I hope you enjoyed my tutorial today and visit my blog any time at www.rememberinglifesmoments.blogspot.com.

2 comments:
very cool!
Wow! What a way to stretch creativity! Love the way you used the stencil with the embossing powder!
Post a Comment