

Hello! Tracy here with another tutorial! The Globecraft and Piccolo June Design Team Challenge is to create a a scrapbook layout using G&P products. This was a bit of a challenge to me since I do a lot of papercrafts but rarely do scrapbook layouts. So this challenge sent me scrambling to find something to inspire me. Then I remembered some months back I found a box of family photos, many I had never seen of my Grandmother. I was reminded of her love of yellow, gold and rhinestones and I picked my favorite photos the focal photos for this layout. :)
 |
| Tracy Alden Art Ressurected |
Piccolo Bookboard Little Decor Set #12
Piccolo Enamel/Embossing Powder Adhesive
Piccolo Vintage Gold Embossing Powder
Yellow Ochre 3D Enamel Gel
Burnt Umber 3D Enamel Gel
Mars Black 3D Enamel Gel
Piccolo Easy Grip Tweezers
Glastique Matte Finishing Glaze
Heat Gun
Floral stamps
Brown ink
Sticker Gems
Cardstock
Photos
Foam Squares
Cosmetic sponge

Sunshine yellow was one of my grandmother's favorite colors so I started with a large piece of cardstock with a pretty yellow wallpaper print. However the paper was a bit too bright as a background for the photos. To bring down the color and give the look of age I used a blotting motion to apply G&P Yellow Ochre and Burnt Umber 3D Enamel Gel to the card stock with a cosmetic sponge.

I then inked the floral stamp with brown ink and stamped around the edges of the the cardstock. I used different edges of the stamp to give a varied look to the stamped images.

I applied Piccolo Embossing Powder Adhesive to a another flower stamp and stamped around the edges of the cardstock. I then sprinkled on the Piccolo Vintage Gold Embossing powder and heat to set.

Carefully I separated the Piccolo Bookboard Little Decor Set #12 and applied Piccolo Enamel Adhesive to the front of all of the pieces. I coated all of the pieces with Piccolo Vintage Gold Embossing powder and heat to set.

I cut a light brown piece of card stock to fit under the largest of the frame pieces and repeated the same blotting application to give the look of age by applying G&P Burnt Umber and Mars Black 3D Enamel Gel to the card stock with a cosmetic sponge.

Once again I applied Piccolo Embossing Powder Adhesive to a flower stamp and stamped around the edges of the cut piece of cardstock. I then sprinkled on the Piccolo Vintage Gold Embossing powder on the cardstock and heat to set.

Using foam squares I applied the largest pieces of the Little Decor Set to the large piece of cardstock. With the smaller piece of cardstock I adhered my grandparents wedding photo and the bookboard frame on top and added foam squares before placing it on the layout.
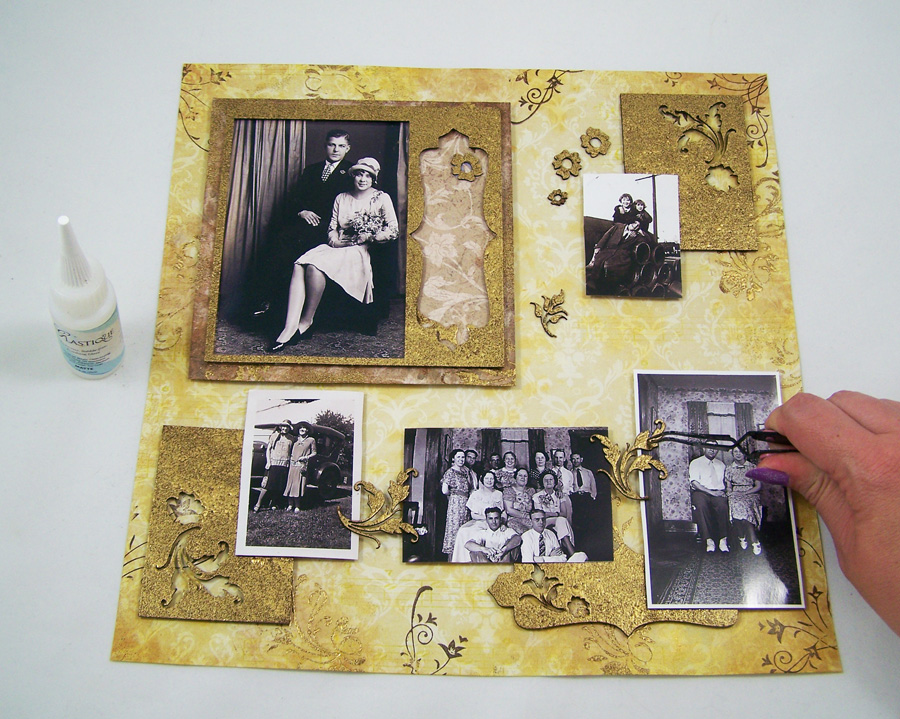
I placed the rest of the photos in the layout with foam squares and carefully glued the small Piccolo swirls and flowers in place with Glastique Matte Finishing Glaze.

Using the Glastique Matte Finishing Glaze I applied little sticker gems and a small name plate, traced from my grandmother's handwriting, to the layout.

Jump on over to my blog Art Resurrected for the inspiration for this post and for more Globecraft and Piccolo craft tutorials!
Until next time, safe travels!

3 comments:
I love all the steps involved in creating that beautiful background! What a difference the embossing powder accents make!
I am glad you liked it! I would love to see what layouts you create. :)
Thank you Linda. :) I swear I am addicted to using embossing powder and trying to use it in most of my crafts! :P
Post a Comment